
I travel four to five times a year for work. My son and I travel two or three times a year otherwise. With all that travel, it’s crazy that I never bothered with Global Entry until this year.
In fact, getting Global Entry wasn’t bad at all. When I think of how much time I didn’t have to spend in line the last two years, it’s cringe-worthy. But I’ve got my pass now — and I’m ready to be your guide to Global Entry.
What is Global Entry?
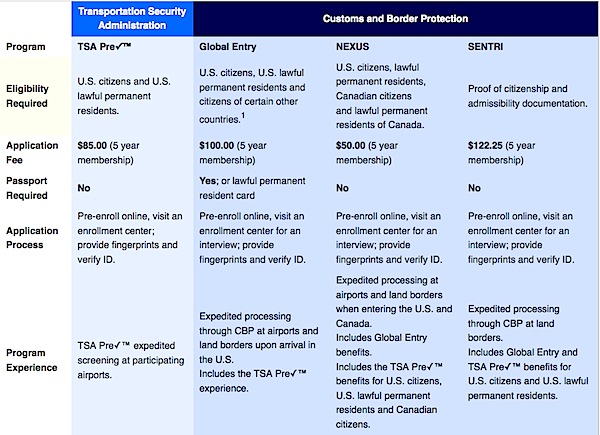
Bascially, Global Entry is All The Things. If there’s a program that speeds you through an airport line (TSA Pre-Check) or lets you drive back from Mexico using a special lane (Sentri), or allows you to breeze through customs when returning from Canada (Nexus), it’s included with Global Entry.
When entering the U.S. after traveling internationally, you have the chance to skip the lines at customs. Plus, because it comes with TSA Pre-Check, you get benefits while traveling domestically. You get to use your special card to use that special line at the airport. You know — the line that moves faster and doesn’t require you to remove your shoes.
How much does Global Entry cost?
Of course, no guide to Global Entry is complete without a look at the cost. It’ll set you back $100. But that gets you five years of use. Consider this: TSA Pre-Check costs $85 for five years. For $15 more (just $3 per year), you can get the benefits of expedited entry back into the U.S.
If you think that you might travel outside the U.S. in the next five years, it’s worth the extra money to just go whole hog and get Global Entry.
Besides, you might not even have to pay for it after all. Check your credit card perks. My Delta Sky Miles card issued me a statement credit as a reimbursement for the cost of Global Entry. Other travel cards like, the Chase Sapphire Reserve, also include a Global Entry/TSA Pre-Check benefit.
Before you apply for Global Entry, make sure you check your credit card benefits. In order to get the statement credit, you have to pay with the card in question. So you need to make sure you choose the right card for your purchase if you want your Global Entry to be essentially free.


How to apply for Global Entry.
You start your application for Global Entry online. You go to the Trusted Traveler Programs page from U.S. Customs and Border Protection. It’s part of the Global Online Enrollment System (GOES). Emails you receive will come from GOES.
Once on the page, you need to select the “Get Started” button. You’ll see a security notification to accept before you can move forward. After accepting the terms, you are on your way. There are three that serve as a guide to Global Entry and the process of applying:
Account
Before you can move forward, you create an account with Login.gov. If you already have a Login.gov account, you won’t need to take this step. Login.gov is designed to streamline public access to different federal services. It’s an authentication that you can use for different government sites for ease.
You need an email address to create this account. Use an email address that you check fairly often so you don’t end up missing important information about your application.
Once that’s done, and you fill out your profile, you will be directed back to your application. It happens fairly seamlessly. It was pretty straightforward and simple when I went through the process.
Global Entry application
Next, you fill out the actual Global Entry application. This takes about half an hour — if you are ready with the documentation and information you need to complete the form. It’s probably one of the longest forms I’ve ever filled out. Not really surprising, though, considering that this is something that allows you easier entrance to the country.
Things will go better for you on the application if you collect what you need to get through the application.
When applying for Global Entry, you must have a passport. If you don’t have a passport, you need to get that squared away first. Because applying for a passport is such a rigorous process, your passport pretty much serves as your identification for Global Entry, and you don’t need other documents to complete the application.
Having your driver’s license on hand can also speed up the application process. If you want Global Entry as a Lawful Permanent Resident, you will need the appropriate card, and it must be machine-readable.
Information that you need to provide on your Global Entry application includes:
- Phone number
- Address history for the past five years (so dig up those old addresses —all of them)
- Travel history for the past five years
- Employment history for the past five years
- Court documents if you’ve been convicted of any crime other than a traffic violation
Also, if you plan to drive across the border from Mexico and into the U.S., you will need detailed information about your vehicle. So get your registration out of the glove box. It should have everything you need to know.
Finally, if you have citizenships in other countries (like dual citizenship), you need to have that documentation handy.
After you finish the application, you pay your fee. You’ll receive conditional approval (or be rejected).
It’s important to note that this is conditional approval only. You’ll be given a conditional approval letter via email. Print this out. Later, you’ll bring it with your to your Global Entry interview.

Schedule your Global Entry interview
When you receive your conditional approval, you’ll be directed to schedule an in-person interview. My conditional approval only took a couple days. However, it’s possible that yours could take longer.
Scheduling the interview can get a little bit tricky. In my case, the closest place to have an interview with a TSA official was three hours away. Additionally, the earliest available time was clear into next year — six months from the time I originally applied!
The next closest place to my home was four hours away, and had an even longer wait time for an interview. In the end, I looked at my scheduled, realized I’d be in Philadelphia before I got anywhere near the end of the year, and scheduled an interview during my time in Philly.
Other than finding a convenient time to schedule an interview, the process was simple. You choose a city, and a list of potential dates and times appears. Once you schedule your interview, it’s just a matter of sitting tight until the day arrives.
The Global Entry in-person interview.
Bring your conditional approval letter and your passport. In addition to these items, you also need proof of your current address. Your driver’s license can provide this. But you also might need to bring a utility bill, bank statement, or rental payment statement. I brought a couple pieces of acceptable mail along, just to make sure I had plenty of documentation.
It makes sense to try to be on time to your in-person Global Entry interview. I arrived about half an hour early because I knew I could run into traffic along my route and planned for extra time. Turns out traffic wasn’t bad at all that morning. But better safe than sorry.
You should receive instructions about how to get to the appropriate office. The Philadelphia airport also had helpful signs directing you to the TSA offices. Pay attention because every airport is different.

However, no matter where you go, there’s a good chance that you can’t just stroll into the TSA offices. I was confronted by a door buzzer with a camera. Before I could come in, I had to give my name and why I was there. Only after they verified that I had an appointment did they send someone to escort me.
I was taken to a waiting room and sat with other people waiting for their own in-person interview. When it was my turn, an agent escorted me back into an office. There was one other desk in the office, and someone else was having an interview with another agent.
The line of questioning seemed more about personal things, rather than a checklist. It was more like the agent was trying to get a feel for me as a person, rather than seeing if I could answer rote questions. My agent was interested in the fact that I live in Idaho, but was completing my in-person interview in Pennsylvania. So I had to explain that whole situation.
He also asked me about some of my travel experiences, whether I travel alone, and what my work is. It only took about 10 minutes.
At the end of the interview, they take your picture and your fingerprints. You have to be fingerprinted if you want global entry. They use a scanner to capture the images.
Activating your Global Entry card
This guide to Global Entry isn’t quite done. Once you finish your interview, the TSA does another review of the situation and decides whether or not to grant full approval. In my case, my full approval was waiting in my email inbox by the time I made the 45-minute drive from the Philadelphia airport to my ex’s apartment. However, it can take a few days in some cases.
Your approval letter will include your known traveler number. This is the number you use when booking flights so you can get the TSA Pre-Check on your ticket. Once you have that approval, you can use the known traveler number when booking.
Most frequent flyer programs and third-party booking sites allow you to save your number as part of your profile. This way, you don’t have to enter it every time you book a flight. Instead, it’s taken care of automatically. This makes the whole process a little easier. For some airlines, though, you might need to re-enter your known traveler number when you check-in for your flight if you want that Pre-Check symbol.
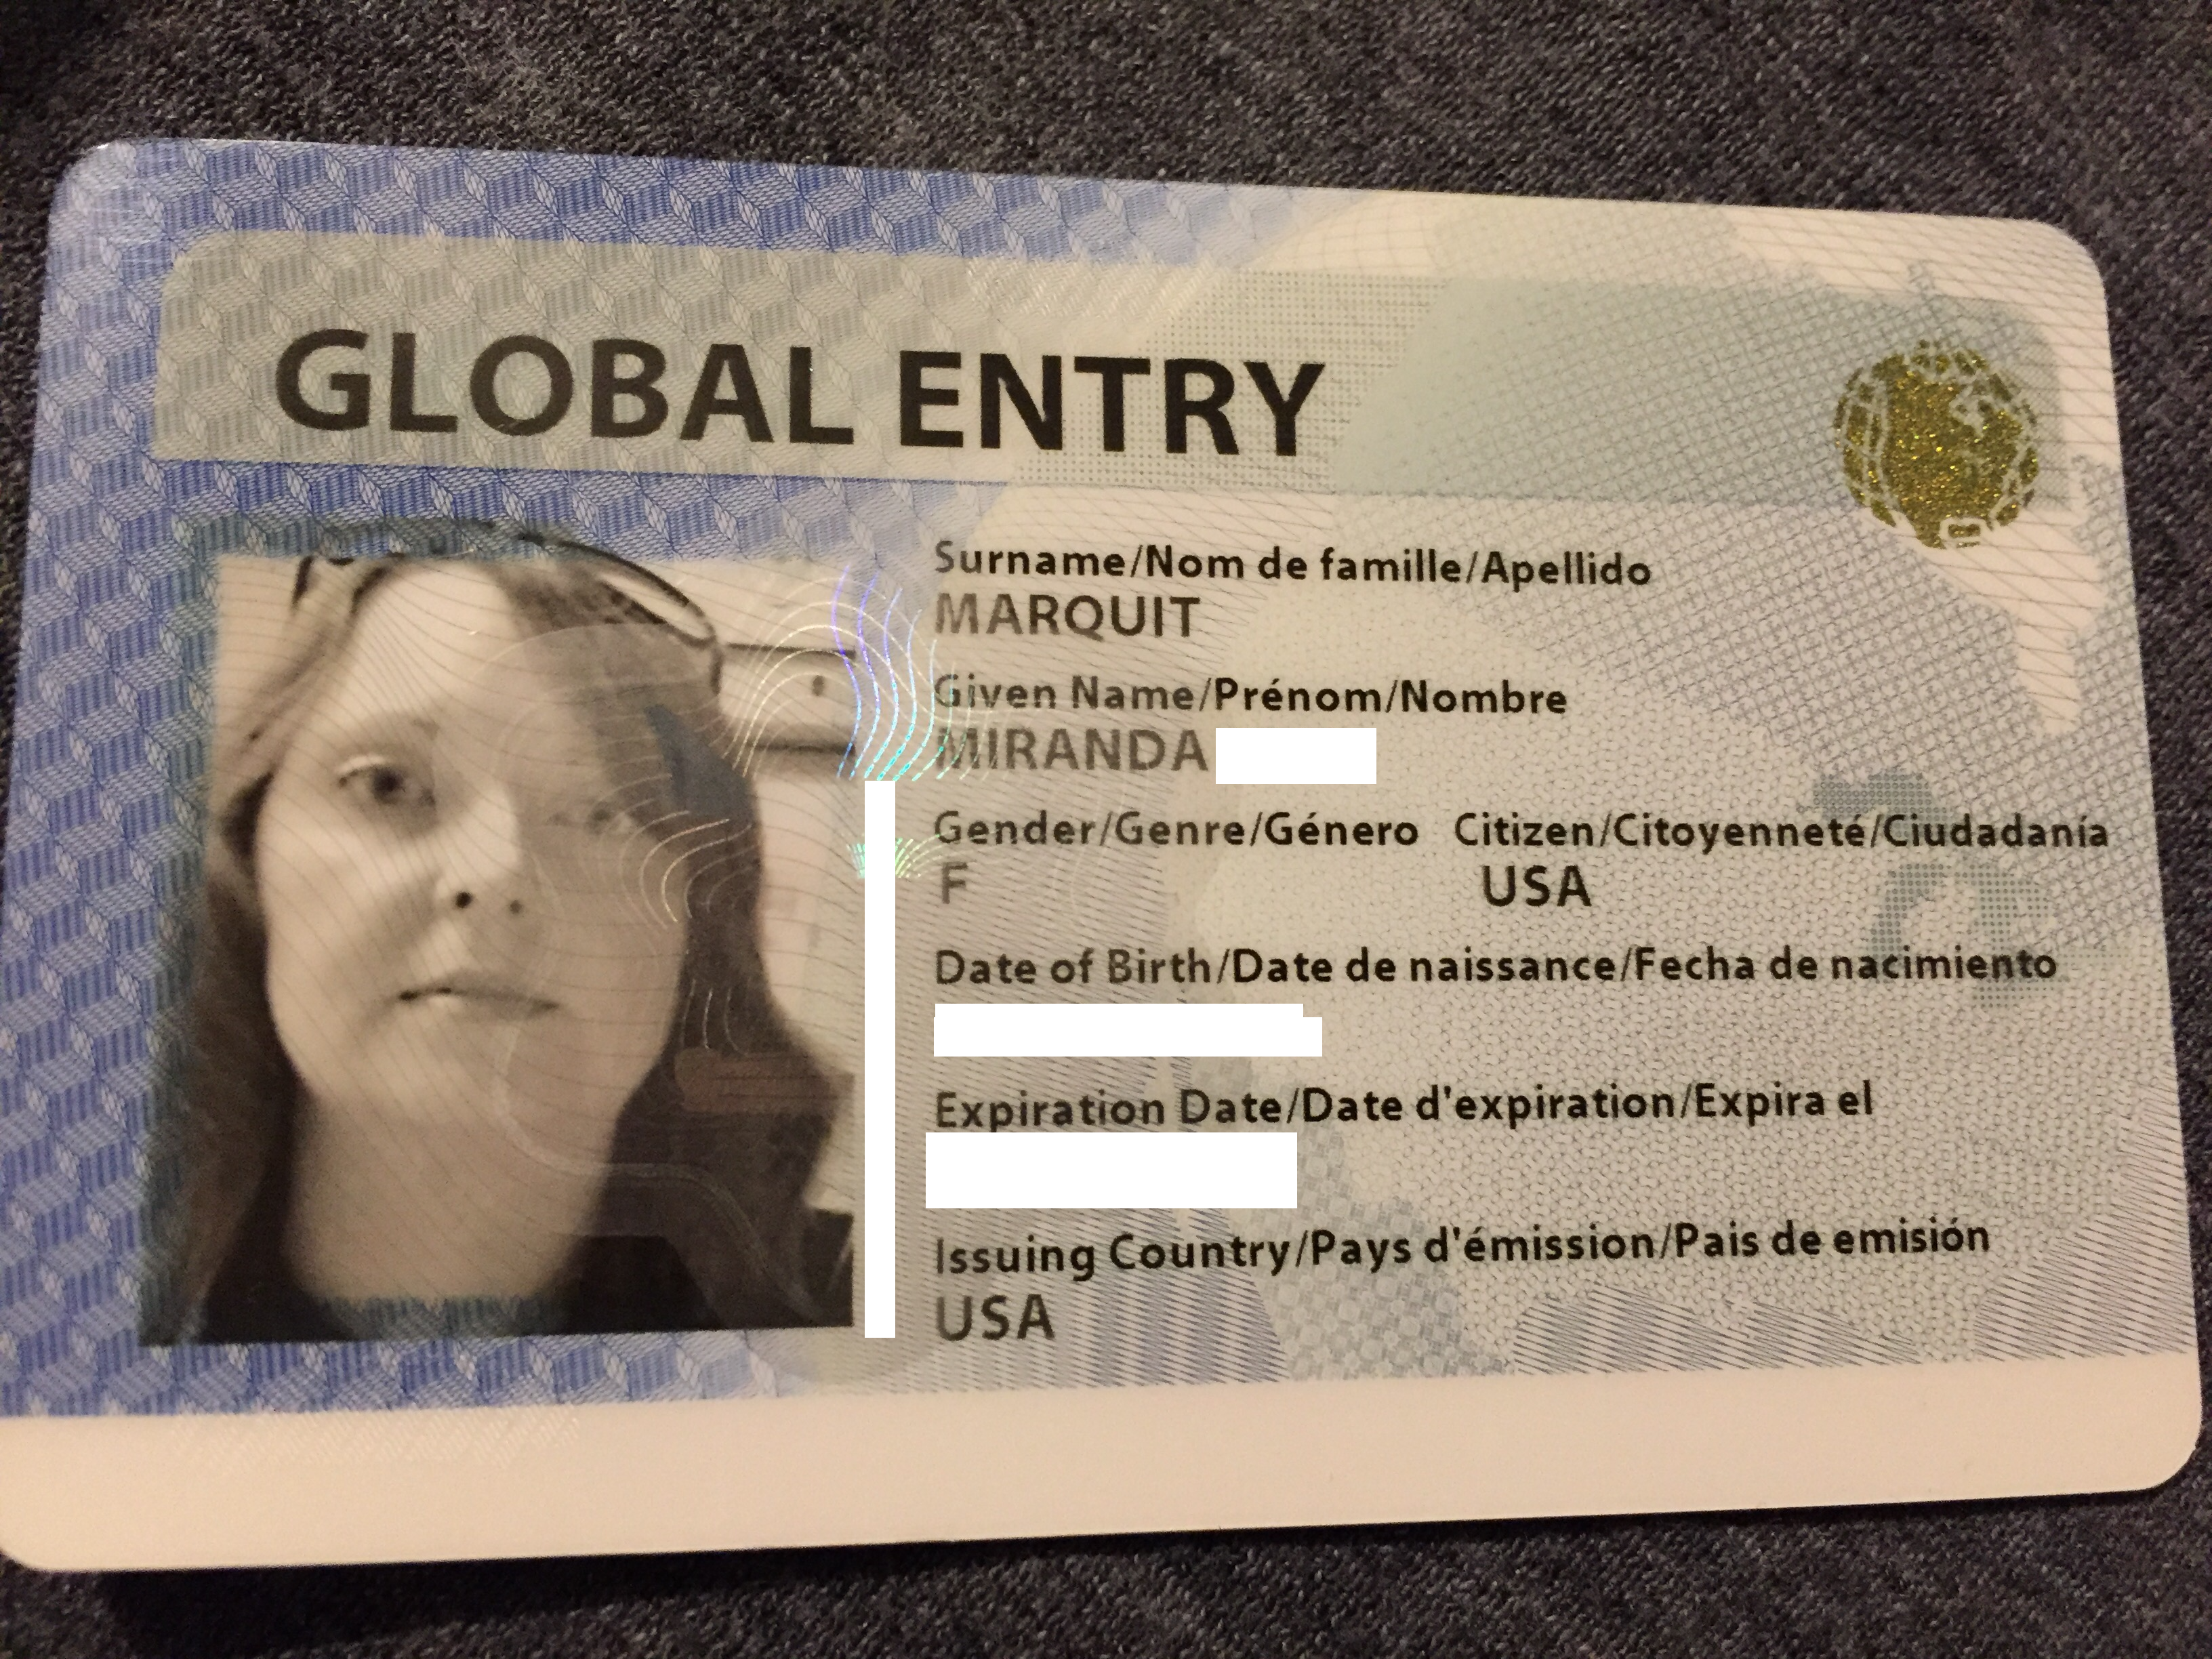
Next, a couple weeks later, you will receive your Global Entry card in the mail. You need to activate it. Luckily, you can do this by logging into your Login.gov account on the Known Traveler page and choosing the right option.
You can use your Known Traveler card at the airport and as a form of ID. And, of course, you can use it when re-entering the country at Customs to expedite your arrival.
What about my kids? Do they need Global Entry?
Your Pre-Check status ensures that minors traveling with you can breeze through the line with you. However, if you want them to get through Customs with you, they need their own separate Global Entry card.
While you don’t need to worry about the residency documentation (you vouch for them), your kids do need a passport to get Global Entry. You need guardian permission to get a passport (and Global Entry) for your minor children. My ex had to sign off on my son’s passport along with my signature being involved.
Keep your documents updated.
Finally, you need to keep your documents updated in the Known Traveler system. If you have a new driver’s license or passport, you need to change the information.
After logging into your account, look for the “Update Documents” section in the navigation. You can use that to change the expiration dates, numbers, and other information so that it’s accurate.
Additionally, you have one year after your Global Entry expires to renew with minimum fuss. At the end of five years, you pay another fee and renew your status for an additional five years.
Is Global Entry right for you?
In most cases, Global Entry is worth having. It’s not much more expensive than Pre-Check, and it comes with many benefits. The TSA offers the following chart to help you compare its different traveler programs: